How to Use
Creating Batch Listings
- Choose a site
- Enter listing information
- Preview the listing
- Enter more listings
- Upload the batch
- Check your listings
| STEP 1: Choose a site | |
|
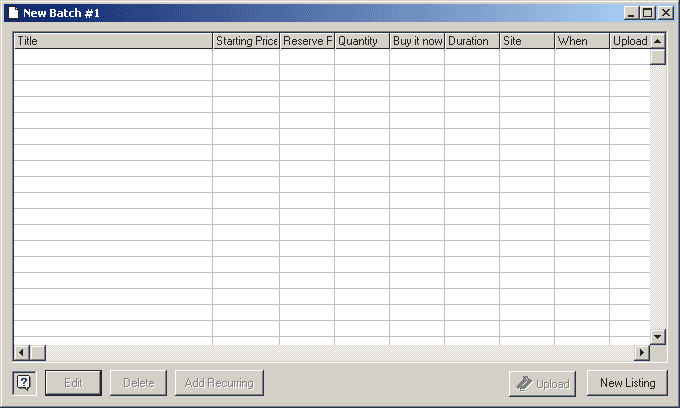
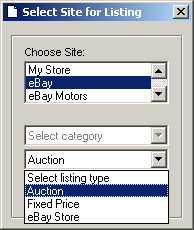
When you first start Sales Manager Pro, a new, empty batch window is open. A batch is simply a group of listings you want to submit using Vendio. To create a listing in the batch, simply click on the "New Listing" button on the bottom right of the window labeled "New Batch #1." Alternately, you can double-click anywhere in the main section of a Batch window. You are then asked to choose a site for the first listing in the new batch. Since each site is different, the site you choose determines the questions you will be asked to create the listing. If you select ebay Motors, you will be asked to select a category on this page. After selecting eBay, you will be asked to select listing type (auction, fixed price, or eBay Store listing).
NOTE: In order to create your listing on a site, you must have a valid username and password for that site. You have to have this username and password in your Vendio preferences so the listings you upload can be submitted to those sites. |
|
| STEP 2: Enter listing information | Back to the top |
|
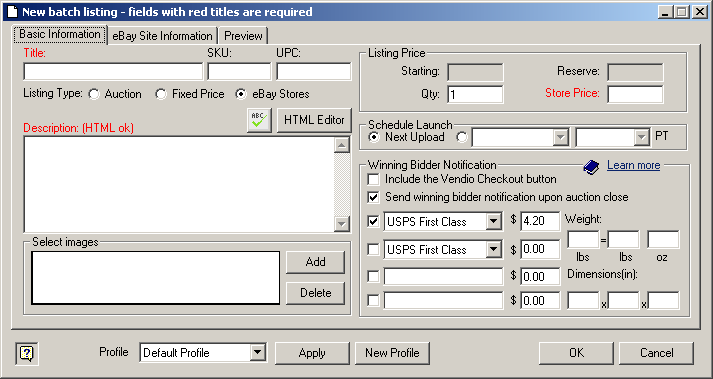
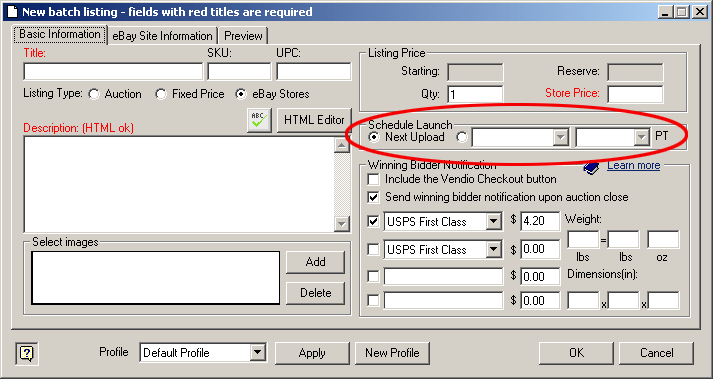
The Basic Information screen is where you enter a Title for the listing, a description, images, pricing, shipping, and other basic listing information. Note that the pricing information required for eBay depends upon the listing type. On this screen you can change listing type using the radio buttons just below the Title field. As you change this Listing Type, you will see the optional and required fields change in the Listing Price section just to the right. Required fields are always in Red.
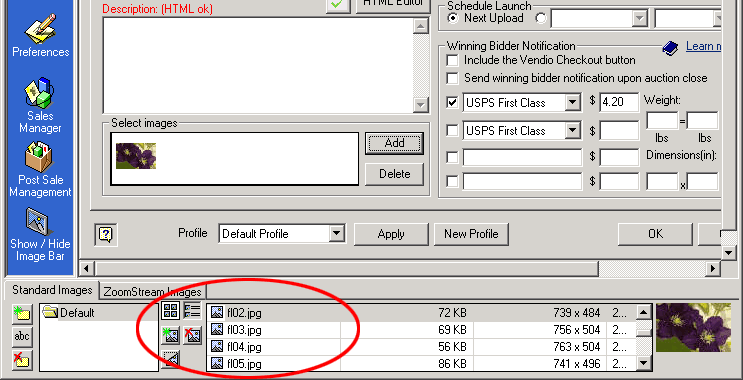
To add an image to your listing, click on the "Standard Images" tab on the image bar at the bottom of the screen. Select and drag the image from the image bar to the Images section of the Basic Information screen. If you don't have any images in the Image Bar, you can add images in two ways. First, if you have images loaded into the Vendio online system, you will need to download your images from Vendio by clicking 'Synchronize.' You can also add images in Sales Manager Pro by clicking the add images button in the image bar or by using CTRL-M. Please note that the image will be included in your listing, but will not be removed from the image bar. You can use it as many times as you like. You can add as many images as you need by dragging and dropping this way. Any images you add to Sales Manager Pro that are not currently included online will be added to your online image directory as well.
To add a ZoomStream Image to your listing, click on the "ZoomStream Images" tab in the image bar at the bottom of the screen. Select and drag the image from the image bar to the "Images" section of the Basic Information screen.
This screen also enables you to schedule the listing launch time. Selecting Launch Now will schedule the listing to launch during the next time you select 'Synchronize.' Alternately, you can select a time at some point in the future. To launch an item at a date later than 20 days out, you can use the launch recurring button on the main New Batch page after saving your item to the batch.
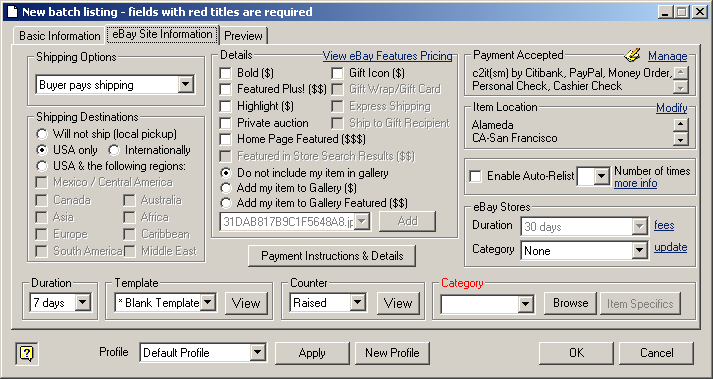
The second tab is for information needed by the specific site you chose. Click on this tab to enter the site-specific information such as payment options and shipping terms. Required fields are again labeled in red. For eBay items, some fields are again conditional depending upon the listing type (specifically Details, Auto-Relist, and eBay Stores sections). eBay category is required for all listing types and Store Category is available to you to categorize all listing types in your eBay Store as well.
|
|

| STEP 3: Preview the listing | Back to the top |
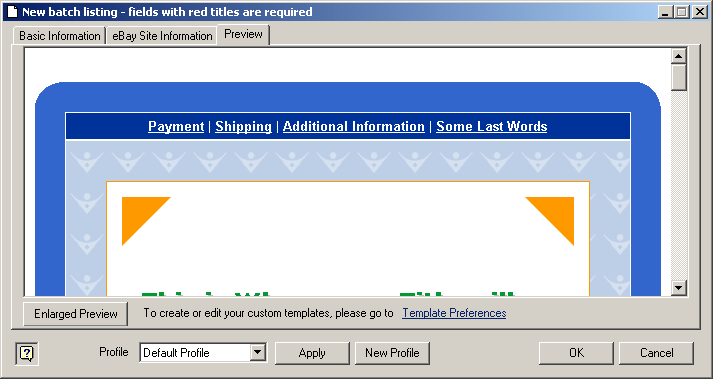
| When you're done entering information for your listing, click the third tab, Preview, to see what your listing will look like on the site. You can go back and change the listing information and these changes are reflected immediately in the Preview window.
|
|
| STEP 4: Enter more listings | Back to the top |
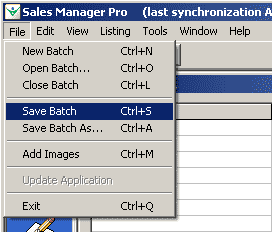
| Enter as many listings as you like to complete the batch. When you're done, save the batch by choosing File > Save Batch. It's a good idea to include the date in the name. For example, you might use CDs41500 for a batch of CDs submitted on April 15th.
|
|
| STEP 5: Upload the batch | Back to the top |
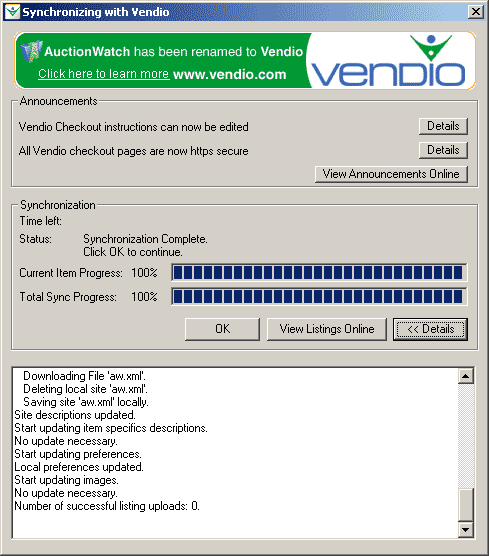
| Click Upload Batch/AuctionSyncTM. You will be asked which batches you wish to upload. Select as many batches as you like. While Sales Manager Pro uploads your batches, it will also download any changes you have made on Vendio, such as adding or deleting images or changing passwords or preferences. Sales Manager Pro also uploads any images you have imported into Sales Manager Pro. For more information on importing images, see How to import images.
|
|

| STEP 6: Check your listings | Back to the top |
After the Upload Batch/AuctionSync process has completed, you can check the status of each auction online in your Sales Manager Control Panel or by reviewing each Batch within Sales Manager Pro. To quickly go online to your Sales Manager Control Panel, click the Auction Management icon in the application's left hand navigation. You can view the auction status for all your pending and active auctions on each listing venue in one location.
If you would rather not go online, you can review each Sales Manager Pro Batch that you just uploaded. A batch column called Upload Status helps you keep track of each individual auction.
Another tool to help you determine if an image was successfully uploaded is to view the Synch Log. During the Upload Batch/AuctionSync process, you can select the Details >> button and open a window that will give you specific information about all the transactions that are happening during the AuctionSync.
|
|