
Getting Started Guide for Users Migrating from Auctiva
Vendio welcomes all our new members coming from Auctiva. We've created this step-by-step quick start guide for sellers coming from Auctiva to help you get started quickly and efficiently on the Vendio Platform.- Set Your eBay Token
- Import Your Products From eBay
- Set Your Account Preferences
- Set Up Your Profiles
- Customize Your Vendio Account
- Add Folders
- Additional Resources
- Important Notes for Auctiva Users
Set Your eBay Token
| 1. Log into your Vendio Account and select the Preferences link on the right | 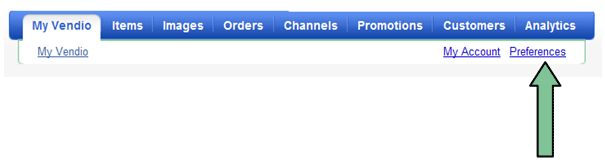 |
| 2. Choose the Preferences page for Channels. | 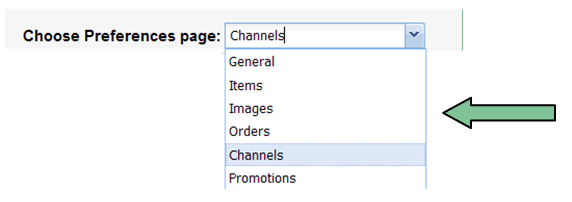 |
| 3. Under eBay Market IDs, click on the Add New button. | 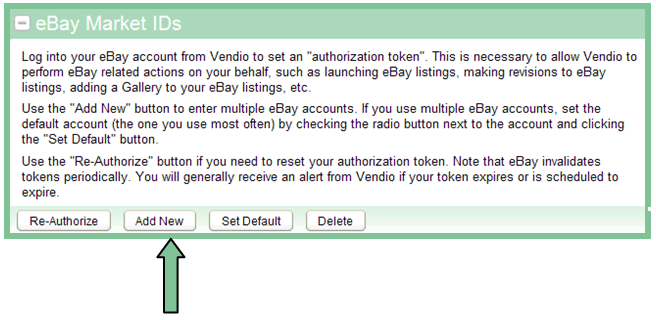 |
| 4. Enter your eBay User ID and password and click Sign In | 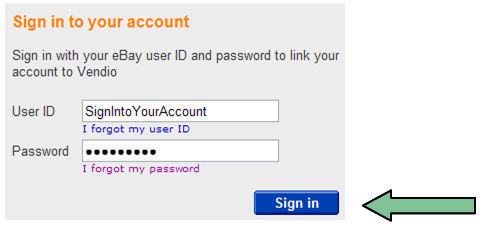 |
| 5. Click I agree to link your Vendio Account to your eBay Account. | 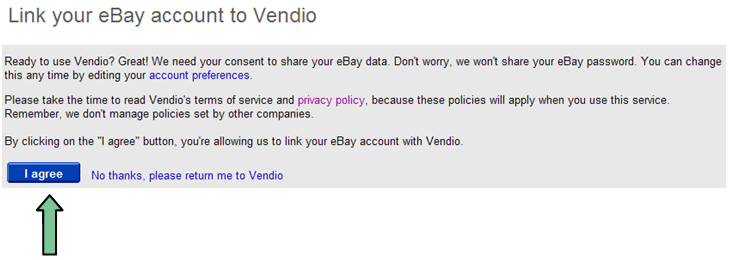 |
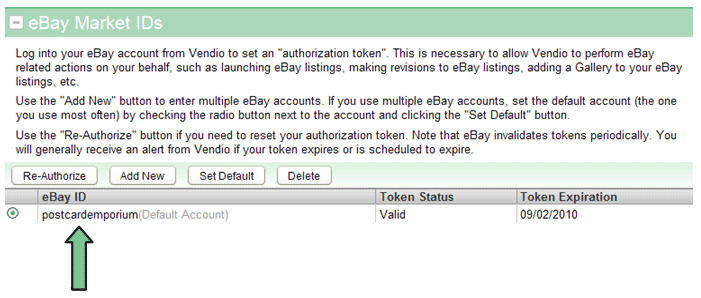
| 6. Your eBay ID should now appear on Vendio under eBay Market IDs. To enter multiple eBay accounts, repeat the steps above for each account. |
 |
| If you have added multiple eBay accounts, select a default account by clicking on the eBay ID and selecting the Set Default button. | 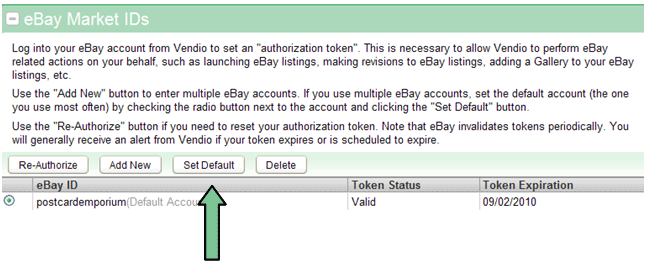 |
Import Your Products From eBay
| 1. Import is located under the Items Tab. Click on Import Items. | 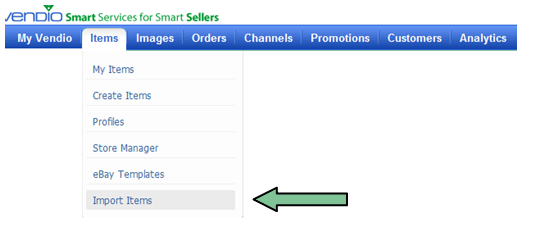 |
| Select your Import Options. | 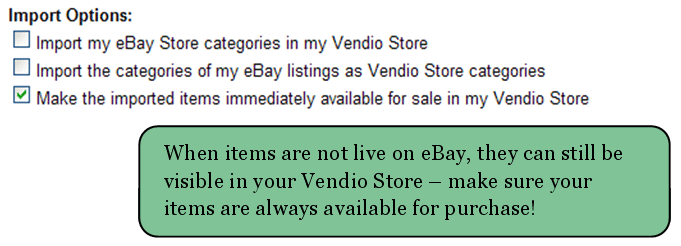 |
| Select your eBay ID from the drop down and click on the Import my eBay Listings button. | 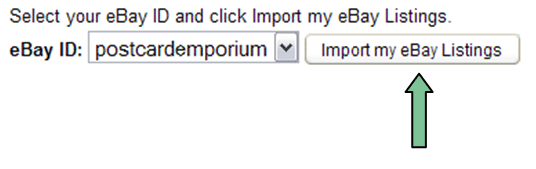 |
Set Your Account Preferences
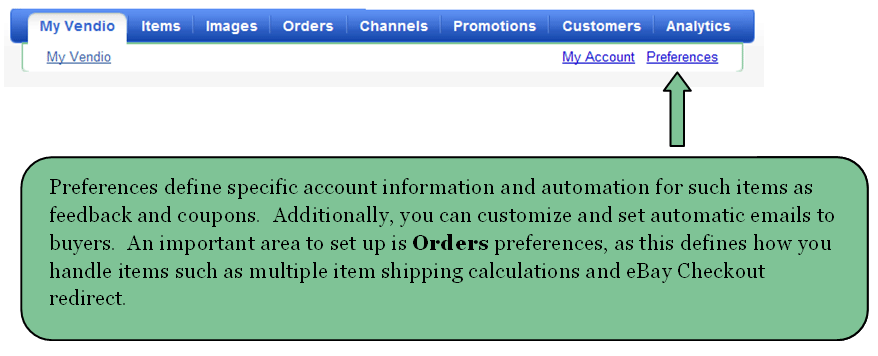
| 1. Review and set up your Preferences. Log into your Vendio Account and select the Preferences link on the right. |
 |
| 2. Review the individual Preferences pages by selecting them from the drop down menu. | 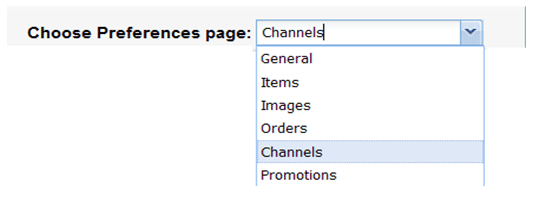 |
Set Up Your Profiles
| 1. Select Profiles under the Items Tab. | 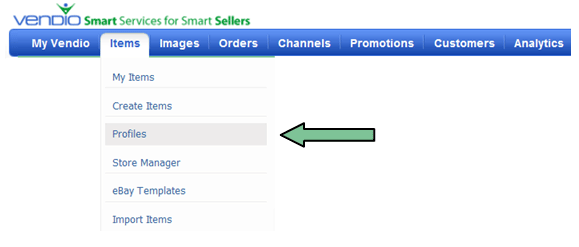 |
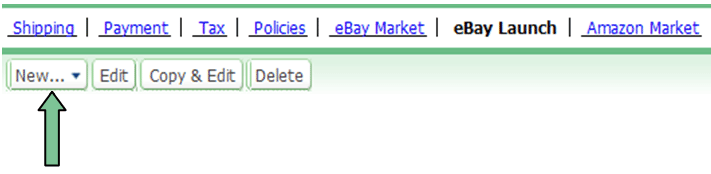
| 2. Set up your reusable Profiles. To create a profile, select the profile type and click on the New button. Multiple profiles can be created for each profile type, to be applied as you create your products (see below.) |
 |
| 3. All pre-created Profiles will be available from a drop down menu when using the Create Items form. | 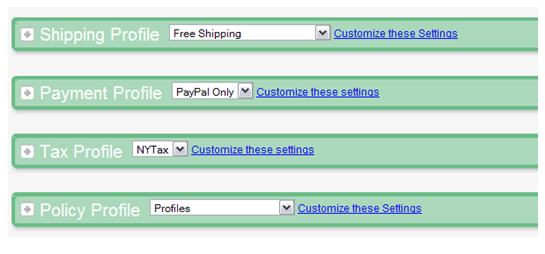 |
Customize Your Vendio Account
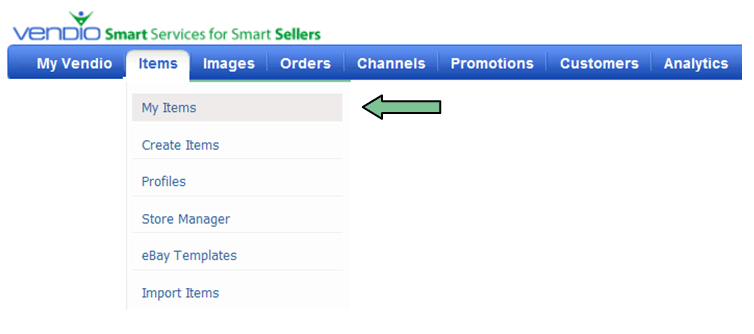
| 1. Customize My Items Your imported products and any products that you create are located under My Items. Select My Items from the Items tab. |
 |
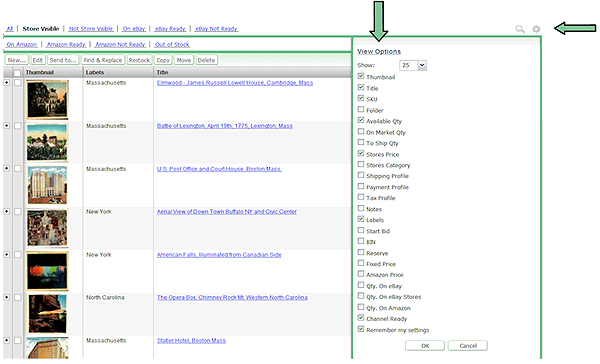
| 2. Click the Gear icon on the top right corner to bring up a list of your View Options.
View Options are fields that can be added or removed from the form, at will, depending on your individual needs. |
 |
| 3. Choose the fields that you want displayed on the My Items page. Click OK when
finished. Change the order your fields appear on the page by clicking on the column header and dragging to a new position. You can resize the columns by positioning the cursor in between the columns headers. |
 |
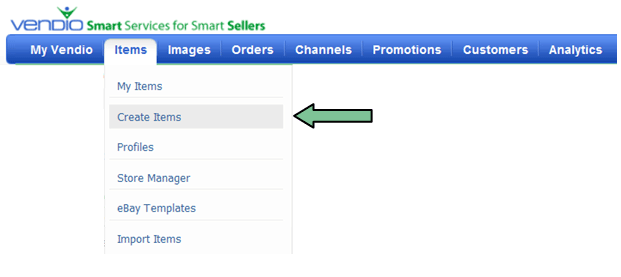
| 4. Customize your Create Items form. The Vendio Platform allows you to create a completely
customized listing form. Create Items is located under the products by selecting Create Items. |
 |
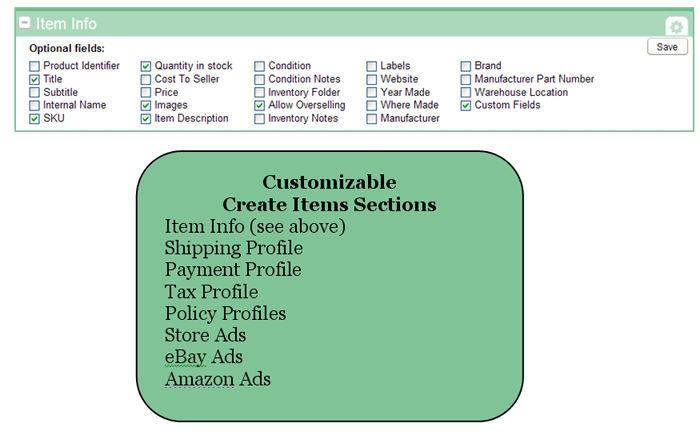
| 5. Customize each different section of the Create Items by clicking the Gear Icon on the right and
checking only those fields that you will use. If you use profiles, some fields included in the profiles can be eliminated as they will be pre-filled. You will see the fields appear on the form as you check/uncheck the boxes. When finished, click Save and then the Gear Icon to Close. |
 |
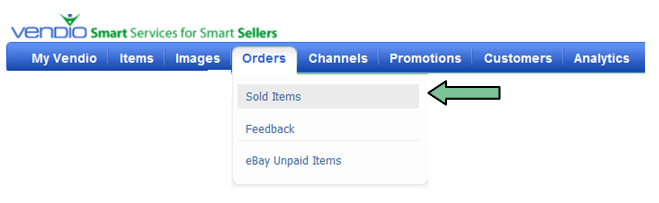
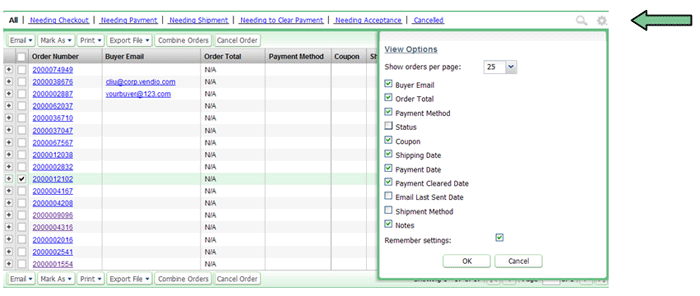
| 6. Customize Sold Items. Sold Items are located under the Orders tab. |
 |
| 7. Customize your Sold Items page by selecting the Gear Icon on the right and selecting only those
fields that you will use. Like My Items, you can resize and click/drag the column headers to reposition them. |
 |
Add Folders
| 1. Create folders in My Items. The folders will be used to store and organize your inventory products. Click "Add" to create a new folder. | 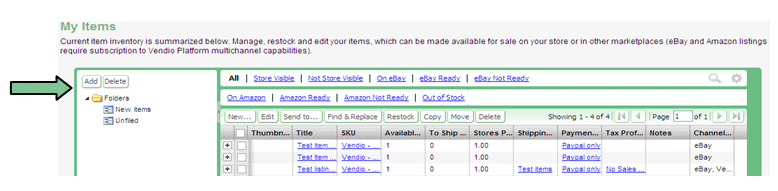 |
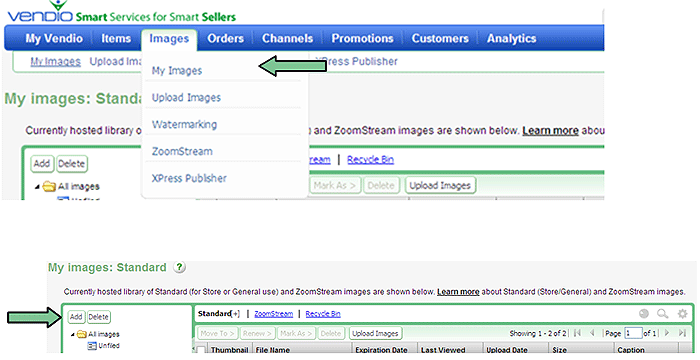
| 2. Create folders in My Images (located under the Images tab.) Click 'Add' to add a folder. You can
upload images and save them directly into your pre-created folders, or you can create new folders "on-the-fly" during the
upload process. Upload images from the My Images page, or as you create products using the Create Items form. |
 |
Additional Resources
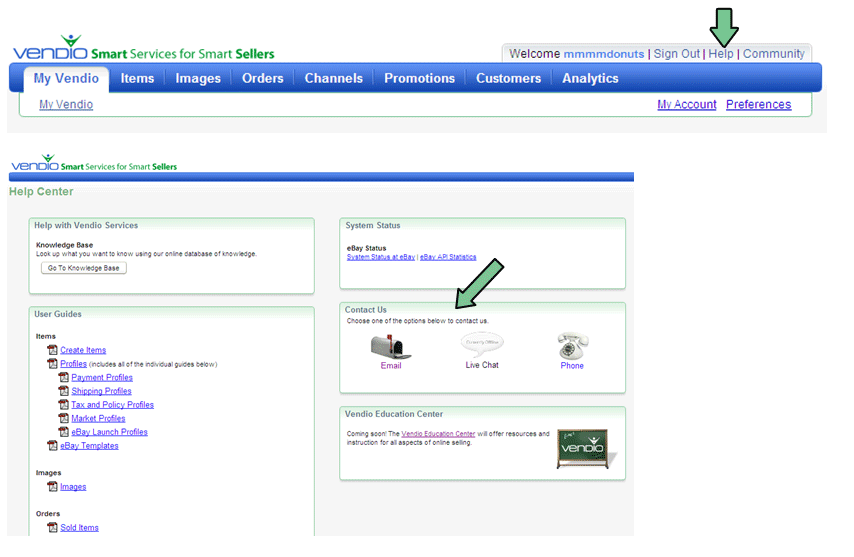
| 1. Additional Help - If you need help with anything, just click the "Help" link at the
top of the page. From here, you can enter an email support request using our customer portal, or, if you are signed up for
Personal Assistance you can request a chat or callback request. You will also find comprehensive User Guides on this page. |
 |
| 2. My Account - Use the My Account link to find and manage your Product Plans, Billing Statements, and edit Account and Billing information. | 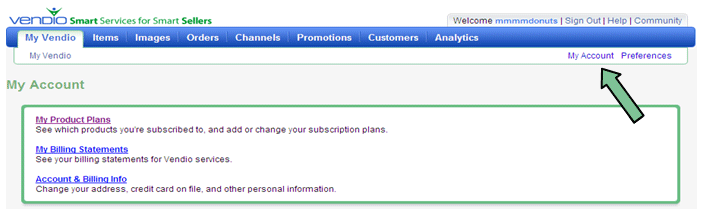 |
Important Notes for Auctiva Users
Image Information - When you import your live products from eBay, the images that are attached to these products will be imported along with them. However, after importing, the image URL(s) are hard-coded into the descriptions and these will still point back to Auctiva. When you cancel your Auctiva account, Auctiva-hosted images will be removed from your listings, so be sure to keep your Auctiva account active until most listings have closed and you are launching through Vendio. If you want to cancel your Auctiva account before all listings with Auctiva-hosted images close, you can fix the listings by editing them and changing the image URL to the Vendio URL, or just cancel the listings and relaunch them from Vendio.Existing Account - If you have an existing Vendio account that is either closed or not currently registered for any listing management tools, we will need to move the eBay ID on file to your new account. You will need to send us the new Vendio account name and the old Vendio account name, along with your Auctiva account name. You may send this information by clicking the "Help" link in your account and submitting a support request (click the email option.)
back to top